
Generate Mock APIs from Real Data Using nock and AWS CDK
April 25, 2025In one of our current projects, we’re integrating with several external systems. Provider A supplies us with data that can change over time. Separately, Provider B pushes events into our system. When this happens, it triggers updates or changes to the data we previously imported from Provider A.
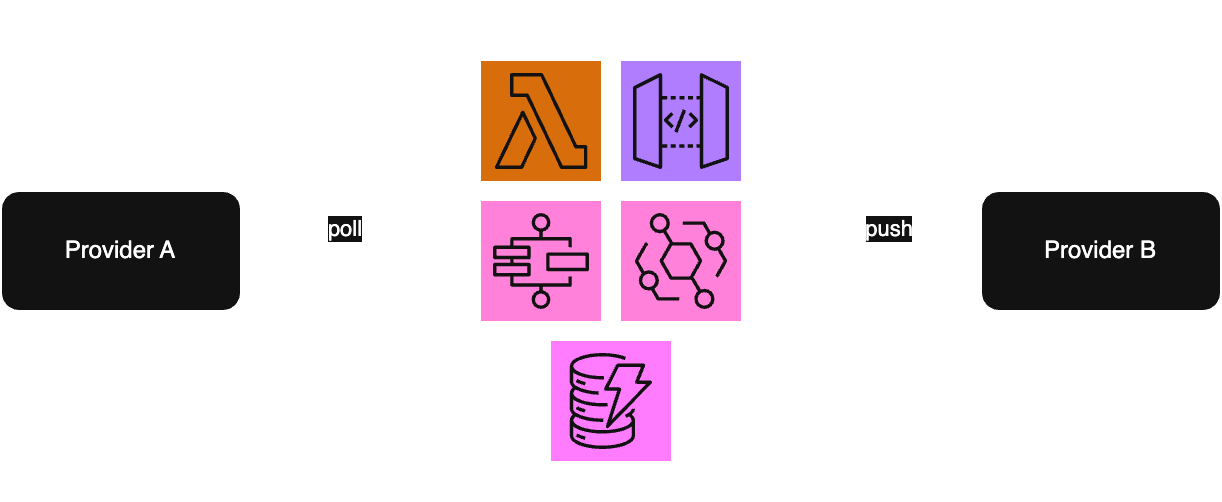
To test these interactions reliably, we need the data from Provider A to remain consistent. That’s why we record its responses and serve them through a mock API. This gives us a stable and predictable environment for testing and development, making it easier to track changes and debug issues.
In this tutorial, we’ll create the scripts that are needed to build an automated mock API using AWS CDK and TypeScript. We’ll use nock to intercept and record responses, save them to a JSON file, and then deploy an Amazon API Gateway that serves these static responses. We’ll also discuss some common pitfalls and how to overcome them. Ready? Let’s get started!
⚠️ We’ll be working with a Harry Potter API for this demonstration, but we want to make it clear that we do not support the views of J.K. Rowling. Our company is committed to a code of conduct that prioritizes inclusivity, respect, and equality for everyone. The purpose of this tutorial is purely technical, focusing on the process of building and deploying a mock API.
Prerequisites
- Node.js installed
- AWS CDK installed
- AWS Account
Step 1: Setting Up the Project
Create a new directory and initialize a new CDK typescript project.
mkdir mock-api-cdk
cd mock-api-cdk
cdk init app --language=typescript
Install required packages
npm install nock node-fetch @types/aws-lambda
Step 2: Recording API Responses
Create a script scripts/record-api.ts to use nock and save the responses to a JSON file:
import * as nock from 'nock';
import * as fs from 'fs';
import * as path from 'path';

const BASE_URL = 'https://wizard-world-api.herokuapp.com';

type Inventor = {
  id: string;
  firstName: string;
  lastName: string;
}

type Elixir = {
  id: string;
  name: string;
  effect: string;
  sideEffects: string;
  characteristics: string;
  time: string;
  difficulty: string;
  ingredients: {
    id: string;
    name: string;
  }[];
  inventors: Inventor[];
  manufacturer: string
}

type Wizard = {
  elixirs: {
    id: string;
    name: string;
  }[];
  id: string;
  firstName: string;
  lastName: string;
}

async function fetchWizardsAndElixirs() {
  // Enable nock recording
  nock.recorder.rec({
    output_objects: true,
    dont_print: true,
  });

  try {
    const wizardsResponse = await fetch(`${BASE_URL}/wizards`);
    const wizards = await wizardsResponse.json() as Wizard[];

    const delay = (ms: number) => new Promise(resolve => setTimeout(resolve, ms));

    // keep track which elixirs have been queried to avoid duplicates
    const queriedElixirs: string[] = [];

    // Process all wizards and their elixirs sequentially
    for (const wizard of wizards) {
      for (const elixir of wizard.elixirs) {
        // Check if we've already queried this elixir
        if (!queriedElixirs.includes(elixir.id)) {
          await delay(50); // Add delay to avoid rate limiting
          await fetch(`${BASE_URL}/elixirs/${elixir.id}`);
          queriedElixirs.push(elixir.id);
        }
      }
    }

    const recordings = nock.recorder.play();

    // Save recordings
    const recordingsDir = path.join(__dirname, '..', 'nock-recordings');
    if (!fs.existsSync(recordingsDir)) {
      fs.mkdirSync(recordingsDir);
    }

    fs.writeFileSync(
      path.join(recordingsDir, 'api.json'),
      JSON.stringify(recordings, null, 2),
    );
  } finally {
    // clean up nock
    nock.recorder.clear();
    nock.restore();
  }
}

(async () => {
  try {
    await fetchWizardsAndElixirs();
    console.log('Finished recording API responses');
  } catch (error) {
    console.error('Error in fetchWizardsAndElixirs:', error);
  }
})();
Run the script:
npx ts-node scripts/record-api.ts
You should now find a nock-recordings/api.json file with the recorded API responses which looks like this:
[
  {
    "scope": "https://wizard-world-api.herokuapp.com:443",
    "method": "GET",
    "path": "/elixirs/b839c9e1-1ee6-4e77-a05a-e862a0f9724c",
    "body": "",
    "status": 200,
    "response": {
      "id": "b839c9e1-1ee6-4e77-a05a-e862a0f9724c",
      "name": "Mrs Skower's All-Purpose Magical Mess Remover",
      "effect": "Cleans stains",
      "sideEffects": null,
      "characteristics": "Strong acrid odour",
      "time": null,
      "difficulty": "Unknown",
      "ingredients": [],
      "inventors": [
        {
          "id": "03ca5597-ded5-419c-9620-31eb44a04457",
          "firstName": null,
          "lastName": "Mrs Skower"
        }
      ],
      "manufacturer": null
    },
    "rawHeaders": {
      "content-length": "356",
      "content-type": "application/json; charset=utf-8",
      "date": "Fri, 04 Apr 2025 08:57:36 GMT",
      "nel": "{\"report_to\":\"heroku-nel\",\"response_headers\":[\"Via\"],\"max_age\":3600,\"success_fraction\":0.01,\"failure_fraction\":0.1}",
      "report-to": "{\"group\":\"heroku-nel\",\"endpoints\":[{\"url\":\"https://nel.heroku.com/reports?s=LW5Sp30DqIRhmdbAoITGVNolSjc2hnevcrFSUYQDMmM%3D\\u0026sid=812dcc77-0bd0-43b1-a5f1-b25750382959\\u0026ts=1743757056\"}],\"max_age\":3600}",
      "reporting-endpoints": "heroku-nel=\"https://nel.heroku.com/reports?s=LW5Sp30DqIRhmdbAoITGVNolSjc2hnevcrFSUYQDMmM%3D&sid=812dcc77-0bd0-43b1-a5f1-b25750382959&ts=1743757056\"",
      "server": "Heroku",
      "via": "1.1 heroku-router"
    },
    "responseIsBinary": false
  },
  // other responses ...
]
Step 3: Deploying the Mock API
Now that the responses are saved in a JSON file, we can deploy an API Gateway that serves these static responses.
In order to preprocess the nock recording, we’ll add a little script returning only the path and response from the nock recording. Also, we will remove the leading slash from the path as it would cause issues with the API Gateway later. For sake of simplicity, we will ignore the rest of the recorded data assuming it’s always status 200 and method GET:
import * as nock from 'nock';

export const getPathResponseMapping = (mockResponses: nock.Definition[]): { path: string, response: any }[] => {
    return mockResponses.map(mockResponse => {
        const path = mockResponse.path as string;
        const pathWithoutLeadingSlash = path.startsWith('/') ? path.slice(1) : path;
        const response = mockResponse.response;
        return {
            path: pathWithoutLeadingSlash,
            response
        }
    });
}
In your CDK stack, add an API Gateway and all the resources from the nock recording:
import * as cdk from 'aws-cdk-lib';
import { MockIntegration, RestApi } from 'aws-cdk-lib/aws-apigateway';
import { Construct } from 'constructs';
import { getPathResponseMapping } from '../scripts/get-path-response-mapping';
import { readFileSync } from 'fs';
import * as nock from 'nock';

export class MockApiDemoStack extends cdk.Stack {
  constructor(scope: Construct, id: string, props?: cdk.StackProps) {
    super(scope, id, props);

    // create REST API Gateway
    const api = new RestApi(this, 'NockMockApi', {
      description: 'My Mock API with responses created with nock',
    });

    // load recorded responses from the JSON file and do the path - response mapping
    const rawMockRecordings = JSON.parse(readFileSync('./nock-recordings/api.json', 'utf8')) as nock.Definition[];
    const pathResponseMapping = getPathResponseMapping(rawMockRecordings);

    // loop through all paths / responses and add them in the API Gateway
    pathResponseMapping.forEach(pathResponse => {
      api.root.addResource(pathResponse.path).addMethod('GET', new MockIntegration({
        requestTemplates: {
          'application/json': '{ "statusCode": 200 }'
        },
        integrationResponses: [
          {
            statusCode: '200',
            responseTemplates: {
              'application/json': JSON.stringify(pathResponse.response),
            },
          },
        ],
        passthroughBehavior: PassthroughBehavior.NEVER,
      }), {
        methodResponses: [
          { statusCode: '200' }
        ]
      });
    });
  }
}
If we try to synthezise this, we’re getting a validation error since a path like /elixirs/123 contains slashes which are not supported by the API Gateway. So we need to split these kind of paths to add each single path-part:
...
pathResponseMapping.forEach(pathResponse => {
  let resource = api.root;
  const pathParts = pathResponse.path.split('/').filter(part => part.length > 0);
  for (const part of pathParts) {
    resource = resource.getResource(part) || resource.addResource(part);
  }
  resource.addMethod('GET', new MockIntegration({
    requestTemplates: {
      'application/json': '{ "statusCode": 200 }'
    },
    integrationResponses: [
      {
        statusCode: '200',
        responseTemplates: {
          'application/json': JSON.stringify(pathResponse.response),
        },
      },
    ],
    passthroughBehavior: PassthroughBehavior.NEVER,
  }), {
    methodResponses: [
      { statusCode: '200' }
    ]
  });
});
...
Nice! The cdk synth command now works without errors. Let’s deploy the stack:
cdk deploy
This creates the API Gateway and adds the resources from the nock recording. You can now test the API by calling the endpoints.
Pitfalls
When implementing the mock API for our customer, we ran into a few issues which I want to share with you.
Cloudformation Resource Limits
Whenever you’re using a large number of resources in your stack, you may hit the Cloudformation resource limit (currently 500 resources per stack). To avoid this, consider moving API Gateway resources into nested stacks.
Using API Gateway in Nested Stacks
If you pass the API Gateway to a nested stack as properties, you might still exceed the resource limits in the parent stack. If you test this behavior with fewer resources than the limit, the synthesized template of the parent stack will contain all the API resources and a more or less empty nested stack (besides metadata, conditions, etc.). It appears that when you pass the API Gateway as a resource between stacks, CDK automatically adds all related REST resources into the same stack where the REST API was originally defined.
So, how do we solve this? The only solution we found was to define the API Gateway in the parent stack and import it by name into the nested stack instead of passing it as a prop.
apigateway.RestApi.fromRestApiAttributes(this, 'Api', {
  rootResourceId: props.rootResourceId,
  restApiId: props.restApiId
});
This way, the API Gateway is defined in the parent stack, and the resources are added in the nested stack without any issues.
API Gateway Resource Limits
Depending on how many other cloud formation resources you have in your CDK stack you might actually run into the REST API Gateway resource limits first. The maximum number of resources for REST APIs is 300 (though this quota can be increased). Since our use case was for testing only, we chose not to request an increase.
Final solution
In order to avoid all the resource limits and pitfalls, we used a proxy integration to serve static responses via a Lambda function. This approach allows us to use the API Gateway without hitting the resource limits. The Lambda function is bundled with the nock recordings file so the only potential limit here is the Lambda size. This could still be mitigated by splitting responses by path (e.g., /elixirs and /wizards) and deploying multiple Lambda proxy functions.
Lambda proxy function:
import { APIGatewayProxyEvent, APIGatewayProxyResult } from 'aws-lambda';
import mockRecordingsRaw from '../nock-recordings/api.json';
import * as nock from 'nock';

const mockRecordings: nock.Definition[] = Array.isArray(mockRecordingsRaw)
    ? mockRecordingsRaw
    : [];

export const handler = async (
    event: APIGatewayProxyEvent,
): Promise<APIGatewayProxyResult> => {
    const pathKey = event.path;

    // find the recording in the mockRecordings array
    const recording = (mockRecordings as nock.Definition[]).find(
        (r: nock.Definition) => r.path === pathKey,
    );

    if (!recording) {
        return {
            statusCode: 404,
            body: JSON.stringify({ message: 'Not Found' }),
        };
    } else {
        return {
            statusCode: recording.status || 200,
            body: JSON.stringify(recording.response),
        };
    }
};
Integration into API Gateway in CDK:
import * as cdk from 'aws-cdk-lib';
import { LambdaIntegration, RestApi } from 'aws-cdk-lib/aws-apigateway';
import { Construct } from 'constructs';
import { NodejsFunction } from 'aws-cdk-lib/aws-lambda-nodejs';
import path from 'path';

export class MockApiProxyDemoStack extends cdk.Stack {
  constructor(scope: Construct, id: string, props?: cdk.StackProps) {
    super(scope, id, props);

    const api = new RestApi(this, `ProxyMockApi`, {
      description: `Mock Proxy API`,
    });

    const proxyLambda = new NodejsFunction(this, 'ProxyLambda', {
      entry: path.join(__dirname, '..', 'functions', 'proxy-lambda.ts'),
    });

    api.root.addResource('{proxy+}')
      .addMethod('GET', new LambdaIntegration(proxyLambda, {
        proxy: true,
      }));
  }
}
Conclusion
With this mock API in place, you now have a stable and reproducible testing environment that relies on static data recorded once from real external systems. This is just a basic example which you can easily extend to your needs – for instance by supporting different HTTP methods, status codes, or even dynamic behaviors (e.g. parameterized responses based on the request). If your mock data grows significantly or changes frequently, this setup can be automated even more by integrating the scripts for recording into your CI/CD pipeline.
Feel free to explore the full solution in our GitHub repository. Happy mocking!

Anne is AWS Community Builder and Cloud Consultant at superluminar. With her passion for software development and everything to do with the cloud, she is always striving to learn more about the latest technologies and trends and to expand her skills. In this blog, she shares her insights and her knowledge on AWS-specific topics.